Project 1939 p7 @the Wrong sHop ink.

GETTING READY TO TURN SOME WHEELS AND THINGS

Home
Getting ready to load up Project 1939P7
Gutting the car @ the WroNg ShoP
Project 1939P7 rusted sheet metal removal phase
Floors rocker panels and more repair
Fabricating floors and rockers phase
A few weeks of some serious metal forming and welding
Getting a grip on it , I think
As the world turns the project goes on
GETTING THE DRIVETRAIN READY
Steering components and other drive train related items
GETTING READY TO TURN SOME WHEELS AND THINGS
FIRE IN THE HOLE !
TARE IT DOWN AND MORE PREP DOWN UNDER
Fire wall patch & prep, rubber body mounts and body work
rubber body mounts, setting the nose on , headlight buckets, ETC.
Pushing the coupe in for setting the front tin
project 1939p7 it's now January 2005
The wrath of winter with project 1939p7
The final phase in the month of July 2005
IT"S DONE , ON THE ROAD, AND CRUSING EVERY CHANCE WE GET!
ABOUT OUR 1939 COUPE
BECKY'S 34
Why Becky Loves cars
OTHER NOTES ON THE BUILD & WHAT WE DID..........
Photos from some of the shows and cruises we attended
Favorite Links
About Me

im001071.jpg

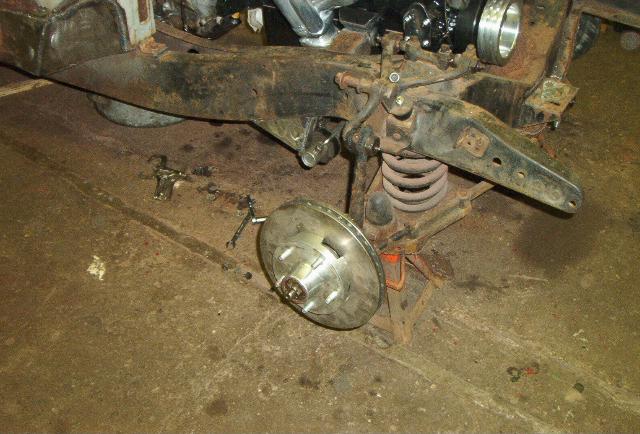
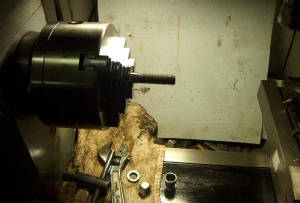
OOPS... here’s a pic where I ran into another problem, as I had mentioned earlier the early nova hubs fit on the spindles, however the bearing seal is going to have to swapped out to match the ID and OD in this location, I’ll just give the dimensions to my auto part supplier and he "John Y" will sort it out. I noticed about 5/16" more of the spindle thread sticking out past the hub’s end, this also will make the track a bit narrower. I’m going to make some a set of inner bearing spacers on the lathe to compensate this so I don’t have to mess with wheel offset.


im001107.jpg

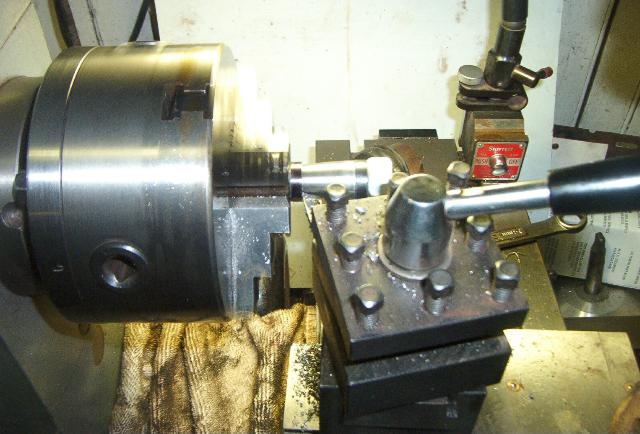
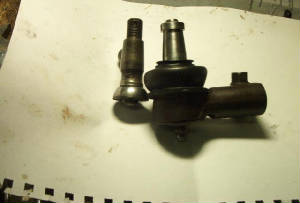
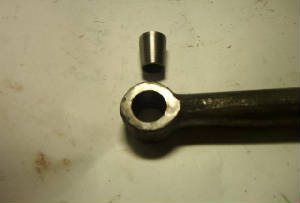
While I’m at the lathe it would be a good time to make some tie rod adapters so that I can get the late model tie rod to work with the steering arms of the 39 Plymouth , not a big deal, just can’t pick my brain back to metal shop in high  school and the mathematics of cutting a taper. I’ll figure it out .

frontdisc.jpg

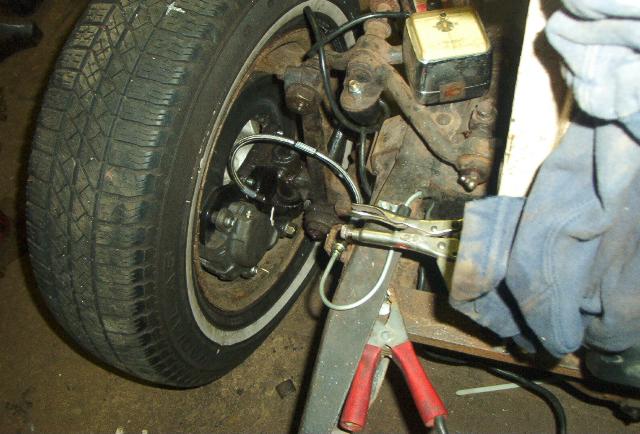
Swapping the right to the left with the calipers worked this way the bleeders are facing up and I didn’t have to make more caliper hangers, guess I was lucky there. Now it’s all coming together and I can’t sleep well at night knowing the "fire it up and drive it out of the shop bet " is just days away. I have been getting out in the shop in the wee hours of the morning "like closing time for the local watering hole" but I got to get her done !

adapterjig.jpg

I made up a jig to hold the stock so I could cut the taper for the tie rod adapters. The adapters came out super but I was stumbling for a while trying to get  it right with out screwing up... we did it !

cuttingthetaper.jpg

homemadeadapterfit.jpg

adaptercuttosize.jpg

The above pic’s show the new rod end to the right with the adapter still able to get chucked as to trim it down to size after assuring the fit is  perfect. Then after sizing it will be pressed into the steering rod and milled flat. It’s going to be just fine.....

Getting ready to put some fire in the 8 holes of this SBC :o)  NEXT PAGE

NEXT PAGE CLICK HERE

DISCLAIMER :

Street Rodding is an enjoyable but serious hobby and like any other hobby safety is foremost the number one concern. Therefore, since I am not by any means a professional car builder just a hobbyist,  any information contained within these pages are just my opinions design/s and  ideas that worked for me.

Furthermore, I make no claim/s as to the accuracy of the information and/or procedures used herein , nor will I accept responsibly and/or any liability/s for the use or abuse should any of the said information used by any party/s should cause injury. Always consult your local and state safety laws and regulations !

Any person/s whom may nominate to use, build and/or copy the method/s in this site would be doing so at his or her/s own risk .